Thera-band exercise tubing is a great way to gently add resistance to movement when you start to strengthen a muscle group, especially when using a new pattern.
1. Sore Feet / Sore Front of the Toes
Begin in an upright sitting position. Loop the TheraBand around your sore foot to explore its uses for TheraBands enhanced recovery. Hold the other end of the band by the handle or anchor the band under your other foot. Pull the band towards you and lift and lower your foot against the resistance of the band. This really helps if you have issues with a sore plantar fascia or a sore heel. Return to the starting position and repeat the movement.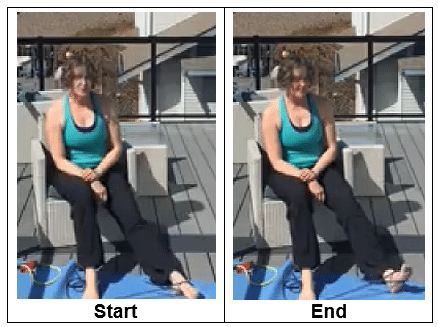
Another way to perform this exercise is to pull your foot out to the side. This is a great active stretch for the bottom of your foot, but you’re also strengthening the muscles along the front of your shin and foot.
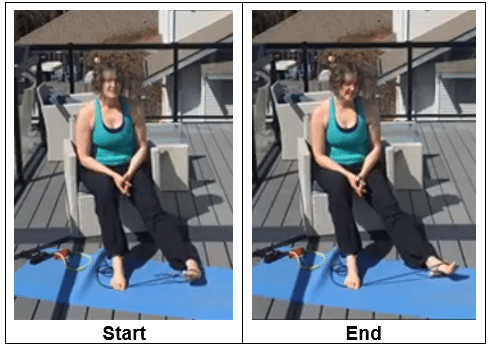
If you are unable to put your foot on the ground due to sensitivity, you can cross your knees and pull your foot in an upward and downward movement.
These are a couple of ways of going through these movements. You’re working the muscles along the front of your foot and shin, and decreasing pressure on the bottom of your foot, desensitizing your heel. Moving in a lateral direction also engages the side of the shin.
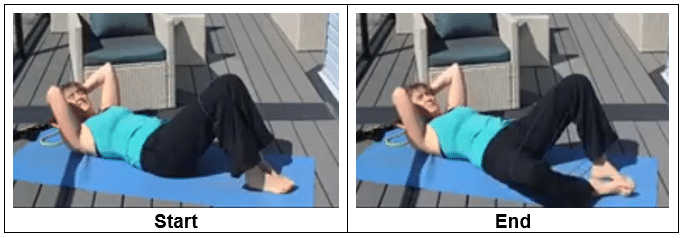
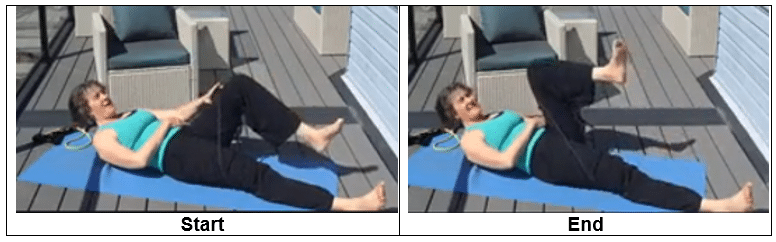
2. Hip Pain
Lie on your back on the floor with your knees bent and your feet flat. Loop the thera-band around your thigh area. Push from your heels to lift your hips, then move your thighs in and out. Return to the starting position and repeat the movement.
This resistant exercise for glutes and your hamstrings also works as an active opener for your deep gluteus and hips.
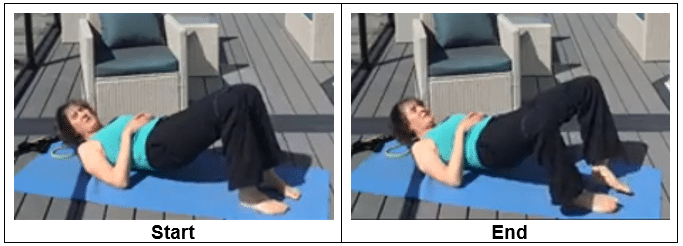
Another way to perform this exercise is to keep your hips on the floor. Place both hands at your head, then lower one thigh out to the side. This is the perfect modification if you have tight hips or groin pain.
Another alternative exercise is to straighten one leg while bringing your other knee towards your chest. With this exercise, you are working your gluteus work on your straightened leg while working your hip flexor on your bent leg.
3. Shoulder Pain
Begin in an upright standing position. Take a big step back with one leg and lower your back knee down to the floor. Wrap the thera-band behind your upper back and hold the ends of the band at chest height. Extend one arm overhead, then return to the starting position. Repeat the movement.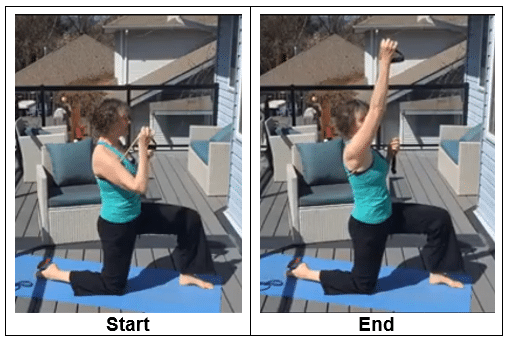
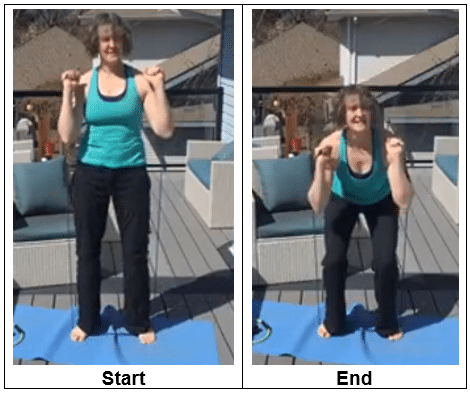
4. Weaker Wrist / Wrist Pain
Begin in an upright sitting position. Step on the center of the band with both feet and hold the handles in each hand with your palms facing upward or downward. Rest both elbows just above your knees. Begin by curling both hands inward. Return to the starting position and repeat the movement.
You can also curl your hands sideways or do a rotation pattern.
5. Sore Knee or Hips When Squatting
Stand upright with the band looped around your thigh area. Hold the handles in each hand with your palms facing upward. Bend your knees and hinge through your hips to lower your body into a squatting position while pulling the thera-band handles to increase resistance. Return to the starting position and repeat the movement.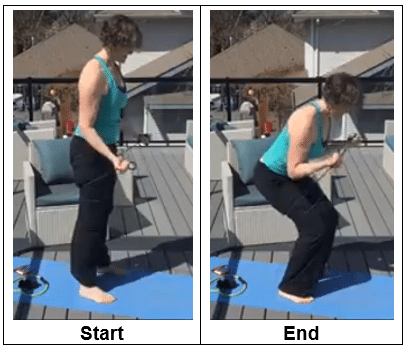
An alternative exercise is to step laterally while in the squatting position.
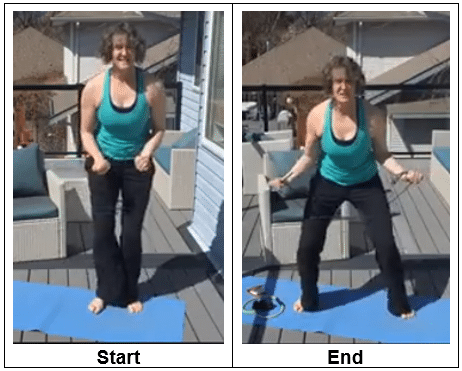
Another option is to step on the center of the tubing, holding the tubing handles in each hand at shoulder height with your palms facing outwards. Bend your knees and hinge through your hips to lower your body into a squatting movement. Return to the starting position and repeat the movement.
Experience the full potential of your workouts with our 10-Piece Resistance Tubing Kit! Elevate your fitness routine, enhance strength, and improve flexibility with this versatile set. Don’t miss out on the opportunity to take your fitness journey to the next level. Grab your TheraBand kit now and unleash its uses for TheraBands strength, flexibility, and rehabilitation!